■Install Recessed Lighting
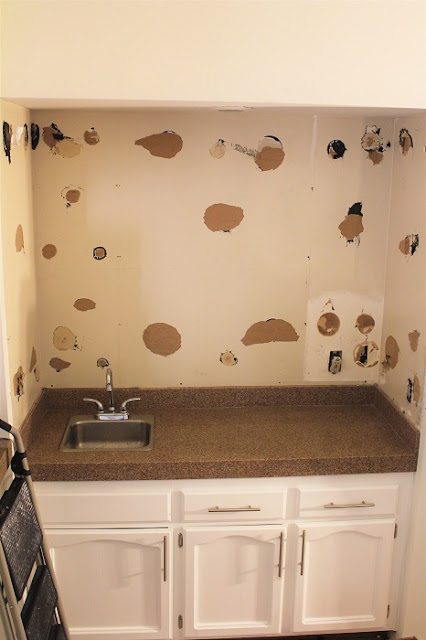
Originally, our wet bar had one old recessed lighting. We decided to remove the old one and install two new Utilitech Pro 4-inch LED Recessed Lighting Kits, Light Color 3111k Bright White #0632280. Last weekend, my husband installed new ones.
Since we purchased our dated condominium last summer, he has installed 10 recessed LED downlights so far. He told me that installing recessed lighting is a piece of cake for him now. He installed them up for our wet bar less than one hour.
Then, he patched the hole which the old lighting used to be located.
■Install Cabinets
Then, we installed two new cabinets, Project Source Unfinished Door Wall Cabinet, to the wall. First, we attached a straight ledger level on the wall.
We referred to this Lowe's video, How to Hang Cabinets, for our cabinet installation.
■Match the Texture on the Walls
This week, he repaired the walls.
For the ceiling, he used Homax Wall Texture Pro Grade Knockdown to match it to the existing knockdown texture on the ceiling. For the walls, he used Homax Wall Texture Orange Peel for orange peel texture.
I think it looks good.
■Paint the Walls
When my husband cut the two holes in the ceiling for recessed light installation, we kept one of them as sample of our wet bar wall, so it helps to find the right paint. When we went to Lowe's last weekend, we brought the sample of the wall and Lowe's staff created a matching paint color for us. :)
This week, I finally painted the walls.
■Install Under Cabinet Lighting
My husband also installed under cabinet lighting. He purchased two Utilitech Pro 18-inch under cabinet LED light bars, Light Color 3129k Bright White.
He used Gardner Bender 3/8" Cable Clamps to secure the codes to the under cabinet.
■Install Cabinet Molding
Yesterday, we went to Home Depot to purchase cabinet molding.
There were so many kinds of molding we could choose from.
We purchased crown molding, light rail molding and so on. We also purchased a filler to fill the gap between the wall and the cabinet.
By adding light rail molding, it perfectly hides under cabinet lighting. :)
 |
| Light Rail Molding |
This is our wet bar now. We will sand the cabinet and paint white starting tomorrow. Next weekend, we are going to install subway tiles for the backsplash. :)
My entries related to home renovations can be seen here.
http://itisapieceofcake2011.blogspot.com/search/label/home%20renovations
My entries related to wet bar renovation can be seen here.
http://itisapieceofcake2011.blogspot.com/search/label/home%20renovations%20-%20wet%20bar
These are my entries you might like.
■Before and After Wet Bar Renovation - Install Backsplash Tiles, Replace Outlet, Paint Cabinets and Decor
■Before and After Master Bathroom - New Shower Handles, Tub Spout And Shower Heads
■ Shower Tile and Bathtub Paints
■ Before and After Door Hardware - From Door Knob to Door Lever
■ Before & After Painting All Cabinets
■ How to Install New Outlet Cover Plate - Hubbell Taymac Revive Decorator Wall Plate Review
■ How to Install A Spring Door Stop
■ Before and After Kitchen Flooring - Easy and Affordable Peel-And-Stick Vinyl Flooring!
■ Built-in Trash Cans - Before and After


No comments:
Post a Comment